Product Overview
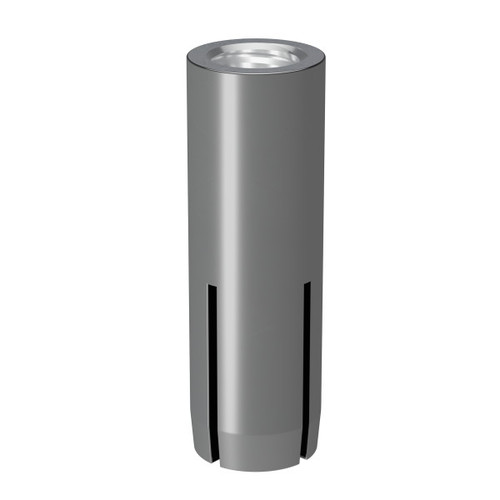
DIABL37 Lipped Drop-In Anchor
Simpson Strong-Tie introduces a new, redesigned Drop-In anchor (DIAB) that provides easier installation into base materials. Improved geometry in the preassembled expansion plug improves setting capability so the anchor installs with 40% fewer hammer strikes than previous versions. These displacement-controlled expansion anchors are easily set by driving the plug toward the bottom of the anchor using either the hand- or power-setting tools. DIAB anchors feature a positive-set marking indicator at the top of the anchor — helping you see more clearly when proper installation has taken place.
Use a Simpson Strong-Tie fixed-depth stop bit to take the guesswork out of drilling to the correct depth. The fluted design of the tip draws debris away from the hole during drilling, allowing for a cleaner installation.
Key Features:
New design offers easier installation than previous drop-in anchor design — sets with 40% fewer hammer hits
Positive-set marking system indicates when anchor is properly set
Lipped drop-in version available for flush installation
Hand- and power-setting tools available for fast, easy and economical installation
Fixed-depth stop bit helps you drill to the correct depth every time
Available in coil-thread version for 1/2" and 3/4" coil-thread rod
Material:
Carbon steel
Finish:
Zinc plated
Installation:
DIAB Manual Installation -
Drill a hole in the base material using the appropriate diameter carbide drill bit or fixed-depth bit as specified in the table. Drill the hole to the specified embedment. For fixed-depth bits drill the hole until the shoulder of the bit contacts the surface of the base material. Then blow the hole clean of dust and debris using compressed air. Overhead installations need not be blown clean.
Insert the anchor into the hole. Tap with hammer until flush against the surface.
Using the designated Drop-In setting tool, drive expander plug towards the bottom of the anchor until the shoulder of the setting tool makes contact with the top of the anchor. When properly set, four indentations will be visible on the top of the anchor indicating full expansion.
Insert bolt or threaded rod. Minimum thread engagement should be equal to the nominal diameter of the threaded insert.
DIAB SDS Installation -
Drill a hole in the base material using the appropriate diameter carbide drill bit or fixed-depth bit as specified in the table. Drill the hole to the specified embedment. For fixed-depth bits drill the hole until the shoulder of the bit contacts the surface of the base material. Then blow the hole clean of dust and debris using compressed air. Overhead installations need not be blown clean.
Insert the anchor into the hole. Tap with hammer until flush against the surface.
Attach the SDS Drop-In setting tool to a drill. Drive expander plug towards the bottom of the anchor using only hammer mode until the shoulder of the setting tool makes contact with the top of the anchor. When properly set, four indentations will be visible on the top of the anchor indicating full expansion.
Insert bolt or threaded rod. Minimum thread engagement should be equal to the nominal diameter of the threaded insert.
Caution:
Oversized holes will reduce the anchor's load capacity